If you expect a room full of monkeys flinging poo, |
||
|
UCSB Extension Flash Class
|
|
|
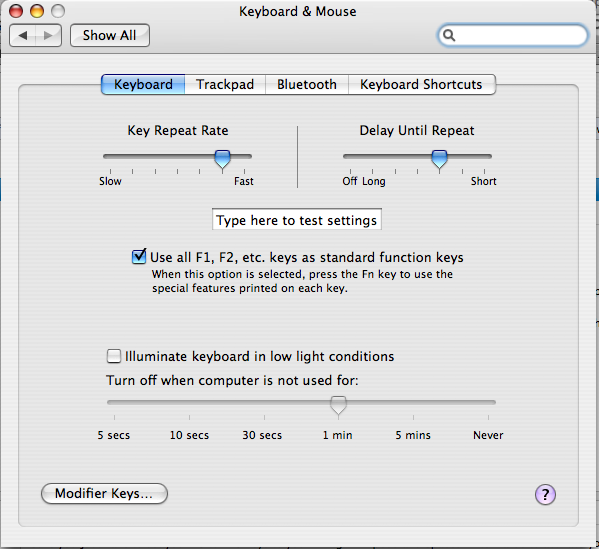
04.07.09: Buttons.zip (Approx 16KB) – 3 button types **Note: When using the "getURL" command, here is the correct syntax: getURL ("mailto: or http:// whatever", "_target"); I accidentally left out the quotes on the "_target" portion during class. It will work this way, but you may get unexpected results down the line. Ok, now that you are somewhat familiar with the basics, please have a look at these files. Two of them are there for reference, and the third, "MovieClipControl.fla" is the next step in adding interactivity to your flash projects. This is just one method of many for accomplishing this, but perhaps the simplest. Assignment for next week's class : Import 5 JPG images and scale them to a resolution of 100x100 pixels (you may want to do this before you import them). Convert each of these images into symbols. This time, however, convert them to "graphics" first, and then create movieclips and animate/tween your newly created graphic symbols within a movieclips. You may alter them any way you like, though (Remember the "break apart" and "trace" functions, too). Now, on the main stage, create a button that links to each of these movieclips (remember to give them instance names). Each of the buttons should be clearly labeled and should start their respective movieclips when clicked. As always, if you have any questions, e-mail me and attach any files in question. See you all next time! J P.S. For those of you experiencing Function key issues in OS X, go to your System Preferences, and under "Keyboard and Mouse", make sure the Fn key option is set correctly (see picture below: may differ slightly from your version).
|
|
Orbit.fla :Just a simple animation for you to take apart basicKeyframeAnims.fla: And one more...
|
04.16.09: Buttons and Basic InteractivityPlus: More about symbols Please go over the "movieclipcontrol" file download from last week's class until you have a good grasp of how the various buttons and movie clips can communicate with each other. We will continue to clarify the functions of symboles, and the uses of the different timelines, but feel free to e-mail me with specific questions. Homework: Find at least five sites with flash content that relate to your theme (whatever that happens to end up being). List specific uses of flash in each site that either interest you, or for which you think you know how they are constructed. Please e-mail me this list no later than Tuesday, so I will have time to compile them for use in Thursday's class. Oh, and for any of you having difficulty saving to Flash 8 format, go to the "File" menu and choose "Save As". Then, under "Save as type", select "Flash 8 Document (*.fla)". Recommended book source: http://friendsofed.com |
|
Note: this file is the basic file without the interactivity |
04.23.09 Animating with Guide Layers In class, we learned how to add interactivity to the motion tween combined with a guide layer. Remember that when creating guide layers, it is easy to accidentally add more layers to the guide than intended. Be sure to check the indentation level of each of your layers to make sure that only the layers you intended to be in your guide layers are indented. Also, if you accidentally added too many layers to your guide layer, you can "undo" this, or change the layer to a "normal" layer by double-clicking on the layer icon (next to the title of the layer) and selecting the "normal" radio button.Homework Assignment: Part one: Using the movie clip "burger menu" we created in class (see sidebar to the left), add interactivity to the menu items. To do this, you may want to refer to the button example files from the 04.07.09 class. Part two: Also add interactivity to the motionguidelayer.fla file (e.g. add a button to start the car moving or make the car act as a button, too). If you are feeling really enterprising, you may want to get a little creative with your motion guide file and come up with your own application of this technique. Note: Please send me the files, or upload them to your individual user accounts so we can go over your work in class and not to mention so you can impress each other. :P Thank you all for your efforts, and see you all next week! |
|
04.07.09 Beeps, blips, & background tracks Click on the links below to download the audio zip files |